Aug 11
2024
Introduction
I want to be able to raise system level interrupts from PIO programs and there aren’t too many examples of this, so here is my simple contribution.
PIO program
First, the PIO program, which simply waits for a pin to change and then immediately raises PIO IRQ 0.
.program irq_example
.wrap_target

wait 0 pin 0    ; wait for a 0 on IN pin 0
irq nowait 0    ; raise PIO IRQ 0

.wrap
Compile this with pioasm then #include the .h in your C program.
C Program
Interrupt Setup
There are four system level interrupts related to PIO: PIO0_IRQ_0, PIO0_IRQ_1, PIO1_IRQ_0, PIO1_IRQ_1. We shall use PIO0_IRQ_0.
First we attach an interrupt handler to PIO0_IRQ_0:
void isr(void) {
    // clear PIO IRQ 0 that was raised by irq nowait 0
    pio_interrupt_clear(pio0, 0);
}

irq_add_shared_handler(PIO0_IRQ_0,
                       isr,
                       PICO_SHARED_IRQ_HANDLER_DEFAULT_ORDER_PRIORITY);
It is important that pio_interrupt_clear() is called otherwise the CPU will lock up constantly executing the interrupt handler (aka ISR - interrupt service routine)
We then enable the interrupt:
irq_set_enabled(PIO0_IRQ_0, true);
Finally we configure PIO0_IRQ_0 to be triggered when PIO IRQ 0 is raised:
pio_set_irq0_source_enabled(pio0, pis_interrupt0, true);
The functions used above are described in the Pico C SDK documentation.
PIO Setup
The PIO program can now by installed the usual way by first setting up the state machine:
uint sm = pio_claim_unused_sm(pio0, true);
uint offset = pio_add_program(pio0, &irq_example_program);
pio_sm_config cfg = irq_example_program_get_default_config(offset);
Configure and connect GPIO to the state machine:
// connect GP 2 to IN of state machine
sm_config_set_in_pins(&cfg, 2);

// it is an input pin
pio_sm_set_consecutive_pindirs(pio0, sm, 2, 1, false);

// we want pull up on the pin
gpio_pull_up(2);
Now we are ready to start the state machine:
pio_sm_init(pio0, sm, offset, &cfg);
pio_sm_set_enabled(pio0, sm, true);
Oct 27
2023
I am in the process of resurrecting my Eq5 Pro so it is compatible with ASIAir Mini. The first step is to build an EQMod Direct USB cable. While it is possible to buy one pre-made, since I had all the parts I decided to build it myself.
Based on …
Sep 17
2023
CO2 concentration is a proxy for how well a space, especially an enclosed one, is ventillated. To this end I build a quick-n-dirty CO2 sensor using a SCD41 breakout board from pimoroni and bits and pieces I had in the workshop.
Took the opportunity to practice making enclosures, especially for …
Dec 26
2022
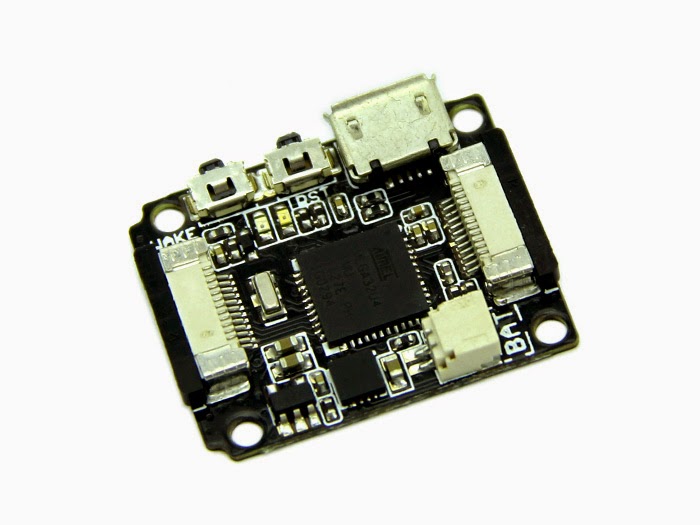
Introduction
Bought some cheap USB driven warm-white LEDs off eBay for lighting display cabinets. Turns out it is just normal LED strips with a simple driver in the USB plug. Wanting to unify control of multiple LED strips into a single point I build a simple PWM based LED driver …
Dec 13
2019
You Need That Resistor
That resistor on the data line? Yeah you need it. Otherwise you might blow an LED which renders the entire rest of the strip useless. If that happens cut out the first LED and solder the power and data lines directly to the second LED.
You …
Oct 04
2015
Introduction
I recently started playing around with software defined radio using a USB TV tuner dongle utilising the popular RTL2832U chipset. After playing around with software like
CubicSDR and
gqrx I was somewhat frustrated at the opaqueness of what is going on under the hood. As such I resolved to …
May 03
2015
 I bought a Seeedstudio Xadow recently, and to get it to work with Arduino 1.6.3 was bit of a pain. Long story short, you can find the necessary files along with pithy instructions at my github repo.
The most crucial difference between the files Seeedstudio supplied and what …
Jul 22
2012
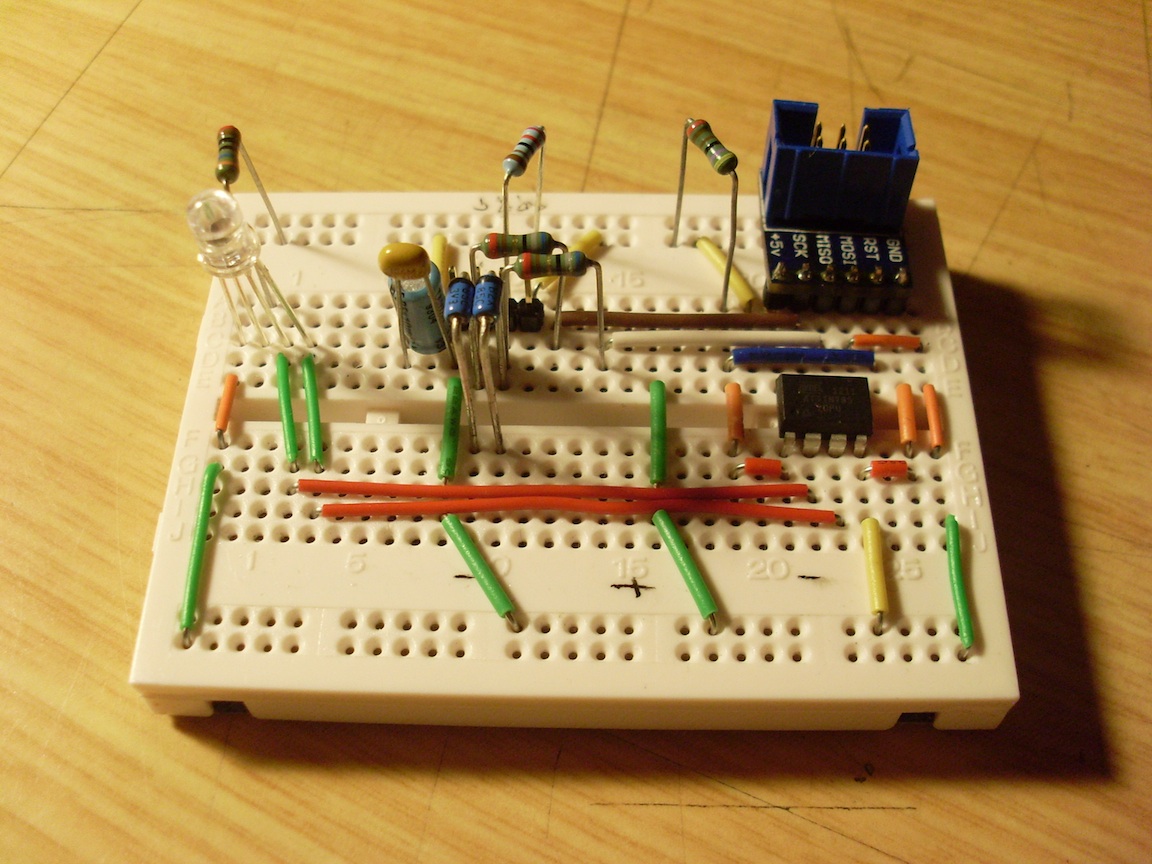
Over this weekend I have been working on faerii, a USB controlled RGB LED based around the ATtiny85.
Here is a picture of the breadboard prototype
|
 |
| faerii breadboard prototype |
The ATtiny85 is mid centre, and immediately above it is the ISP header. To the left of the ISP header, near …
Apr 23
2012
Some notes on using the popular Bluetooth serial module RF-0417C:
- When sending AT commands, do not include \r\n either together or singly.
- It appears to be happy to receive 5V inputs to TX.
- It is not happy to receive 5V to Vcc.
- If you connect a LED, it blinks …
Nov 15
2011
The hijack iPhone library implements Manchester encoding for digital communication. Manchester encoding maps 0 to high-low transition, and 1 to low-high transition.
The iPhone library generates the transitions using full or half period of a sine wave, using a full period when a bit run is detected. An example of …
May 07
2011
Just finished packaging my engineering thesis project into a more portable format: an altoids tin! I have seen people put some neat stuff inside them, and I am chuffed I managed to as well :) Though I had to cut through the lid for the display. And I only had to …
Jun 15
2010
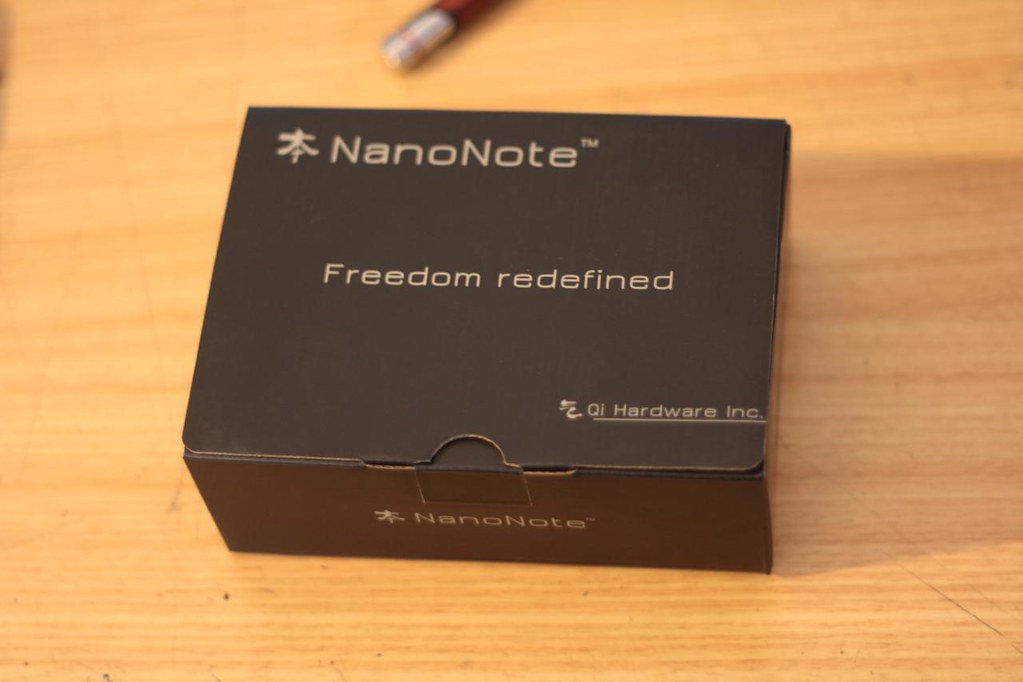
Recently unboxed my Ben NanoNote, and I am impressed. The packaging was top-notch and classy as hell. I would not hesitate to put my name to it.
The NanoNote itself is tiny, and feels fairly solid despite the shiny-appearance which I have come to associate with cheapo devices. It's a …
Jun 15
2010
Dear Silicon Chip,
I recently cancelled my print subscription. You are no longer a magazine I wish to support.
Political commentary on topics like the insulation scheme and global warming has no place in an electronics magazine. The editor(s) are using the mailbag section to push their own agendas …
Dec 31
2009
I spent the better part of two hours struggling with your average HD44780 driven 16x2 character LCD, even though I was using the LiquidCrystal library that comes with the arduino environment. My problem was the text I was printing out looks like this:
I tried a lot of things, like …
Dec 21
2009

This circuit has (as far as I can tell), 0 off current, and 17mA on current. It is latched by the momentary push button, and can be turned off by applying >0.7V at the input as shown. It is intended for use with embedded interactive installation (e.g. an …
Jun 03
2009
The microbric viper is neat. Good quality parts and unique idea. Makes a decent robotics platform if you get the wheel add-on. However, you gotta have small fingers to get some of the parts in place. Despite this, the hardware is solid, I like it. The one thing I would …
Jun 01
2009

Code to drive it is avaliable under GPL.
An updated version of the schematic as a .sch file is available also.
Cheers,
Steve
May 29
2009
[

](http://www.flickr.com/photos/sentientintelligence/3575882456/ "photo sharing")
Thanks to Anthony from Area I.T. & T, I am now a happy owner of a dual channel 40Mhz oscilloscope.
I am happier than a pig in mud!
Cheers,
Steve
May 17
2009
Got my hands on a ADJD-S371 on a breakout board from Sparkfun. The code below can be used to calibrate it. The most up-to-date version of the code can be found at my git repository under colour_sensor_calibration.
``` brush:cpp
include
/ Calibrates the sensor to get white balance. Pin 2 should …
Feb 16
2009
Part number US1440, these sensors are not dual use, which means the transmitter and receiver is not exchangeable. They also look identical from the outside, so if you build my arduino ultrasound ranger with these (as I did) and find you can't see echoes, try swapping your transmitter and receiver …